ESS steps away from Big Red and Mundi Mundi Bash event work. After 11 busy years were we helped to set up and grow these successful and vibrant events it’s time for a change. More info here
ESS steps away from Big Red and Mundi Mundi Bash event work. After 11 busy years were we helped to set up and grow these successful and vibrant events it’s time for a change. More info here

Lucas Trihey 2/3/2020
We take a range of trucks to the Bash each year. This includes B-Doubles, semi-trailers, heavy-rigid trucks, single and bogie drive curtain-side trucks, a crane truck, smaller hire trucks and pantechs. Some have tailgate lifters or tilt-trays. Here’s what we’ve learned.
Every truck gets a bit of ruggedizing. Most trucks used in the city or on sealed roads have vulnerable parts that can be damaged by the flying rocks on the roads of Western Queensland. Our own trucks are permanently toughened up and even hired trucks get temporary rubber stone guards fitted and sensitive parts underneath are protected.
If we won’t meet up with the truck until part way through the journey we take extra rubber flap material and cable ties so we can fit on the road somewhere.
Tyres
On gravel roads we run truck tyres 50% lower than highway pressures. 100psi on the highway becomes 50psi on rough gravel roads. We find this reduces tyre damage and cuts down on vibration damage to the truck body and cab. See the tyre post for more info.
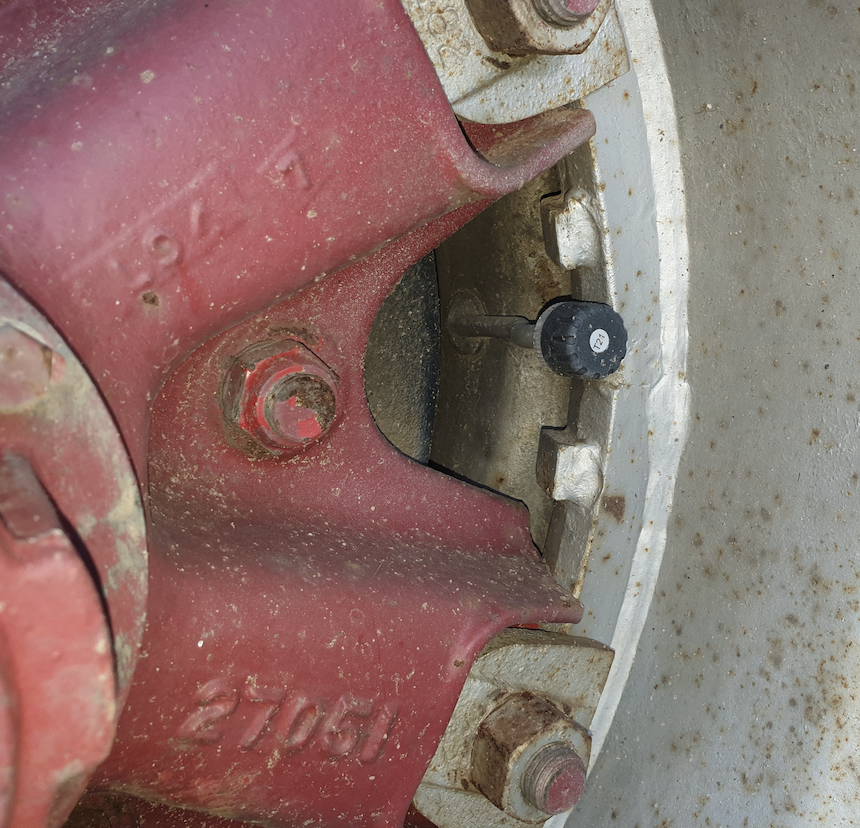
We love tyre pressure and temp sensors and are adding these to more of our trucks. Saving a single tyre caused by a slow leak will pay for a good tyre sensor system.
Underbody protection
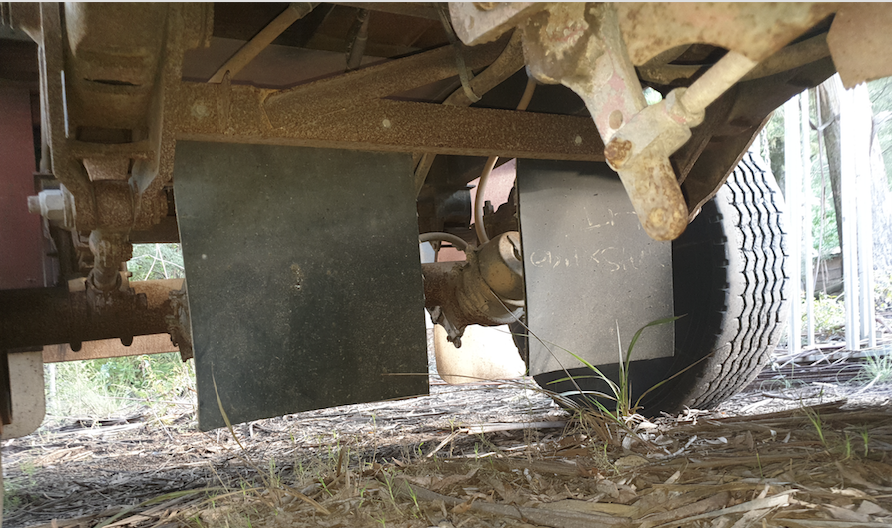
We fit rubber matting across the full width of the trucks, just behind the steer tyres. On semis we also fit a second mat behind the prime mover drive axles. This rubber minimises rocks and stones richoceting around under the trucks that can damage vulnerable parts like brake hoses, sensors, cooling fins, hydraulic hoses, fittings and handles.
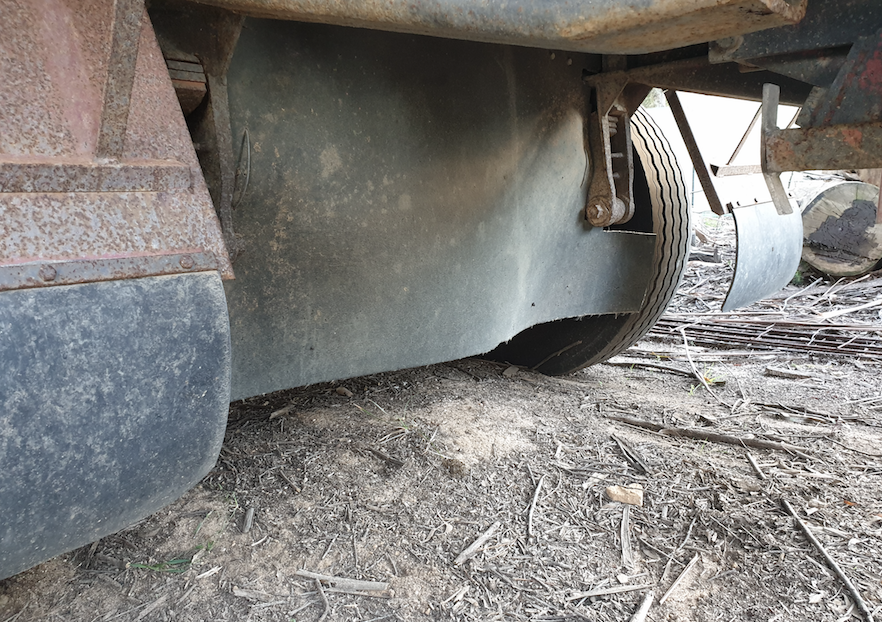
Sensitive parts like cooling fins, the sensors on transmissions and diffs and the controllers for tail-gate lifters or tilt-trays often get secondary protection of their own – usually more rubber, corflute or similar.
Air lines
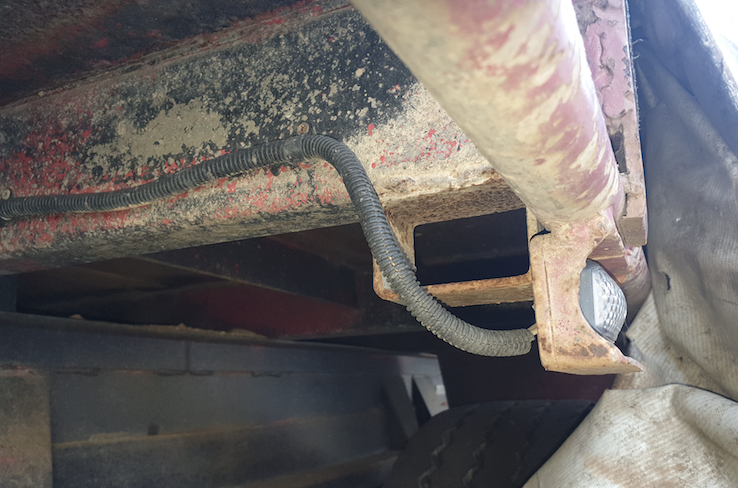
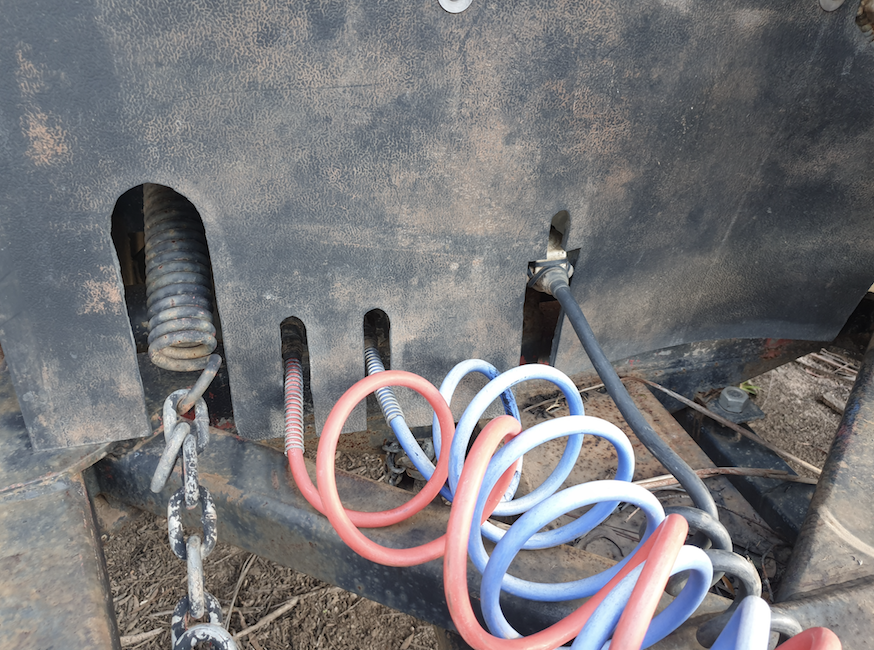
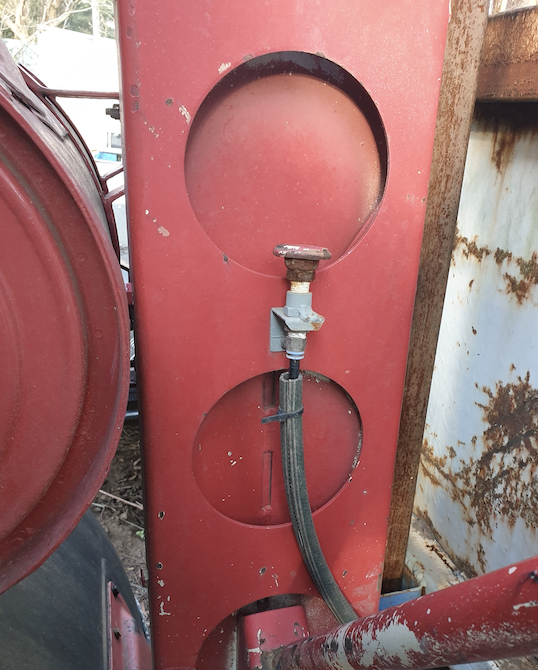
There’s A LOT of vibration on outback roads and any airline that’s near a steel edge or anything sharp can wear through. We fit a split hose over these wherever they pass through a hole or rub against a bracket or part of the underbody. Nylon air lines are thinner and more brittle and get special protection – a split garden hose works a treat.
Fuel lines
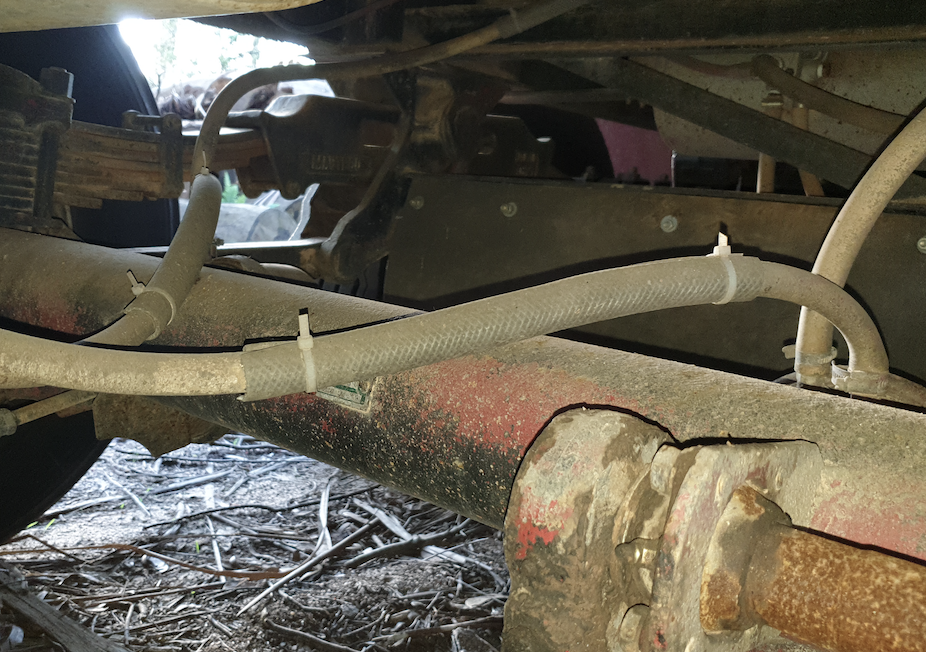
Vibration and flying rocks will damage any hose not well protected. Make sure fuel lines are routed behind steel cross members or underbody steelwork where possible. Protect fuel lines with an extra layer of split hose.
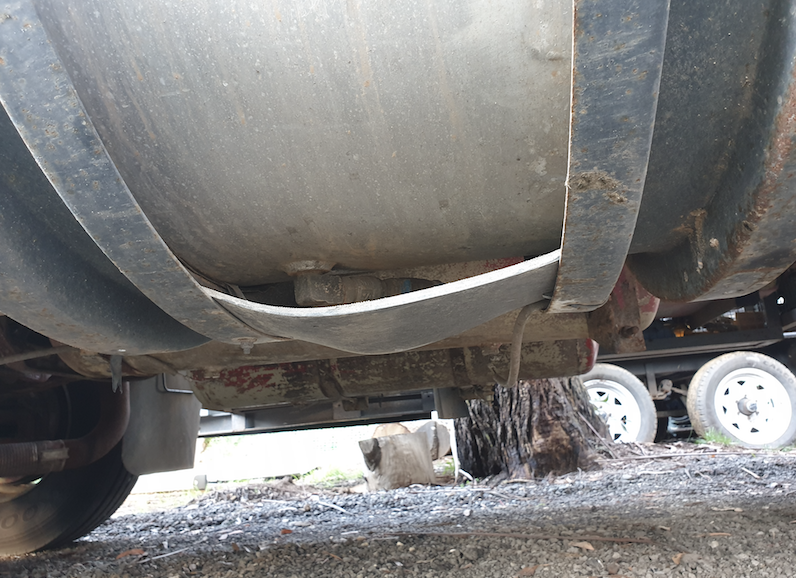
The under-tank drain tap is very vulnerable to rock assault and breakage so make sure these have a stout rubber flap over them for protection. Or cap off the outlet for the outback trip.
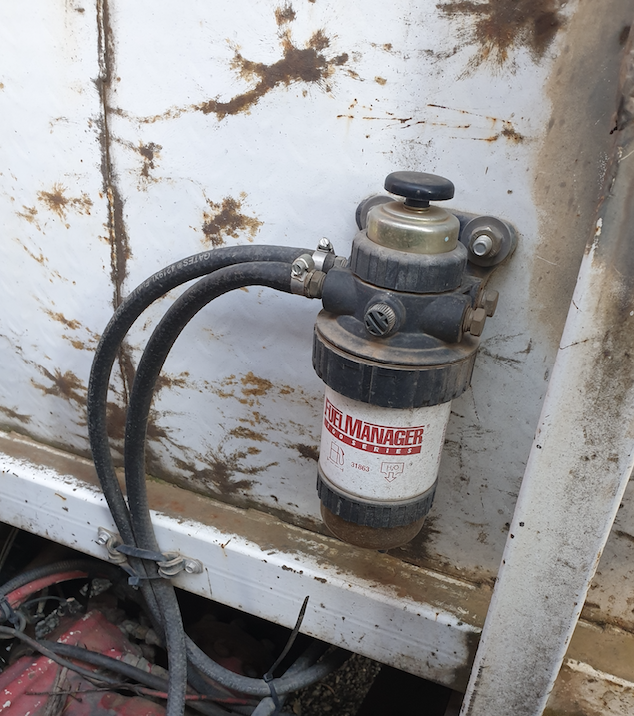
Hydraulic lines
The hydraulic hoses and any steel pipework for Hiab cranes, tailgate lifters or tilt-tray mechanisms need protection using rubber flaps, spiral wrap protection (available from hydraulic suppliers) or by routing away from damage-prone areas. Take special care with the taps and controllers down the back of the truck, we often put an extra temporary cover over these for the long trip out to Birdsville.
Crane parts and bearing surfaces
Our Palfinger crane has large areas of exposed steel rams and bearing surfaces for the slew movements. It’s impossible to keep these free of bulldust and sand on the drive out west. On arrival we clean and grease these parts using compressed air and a grease gun.
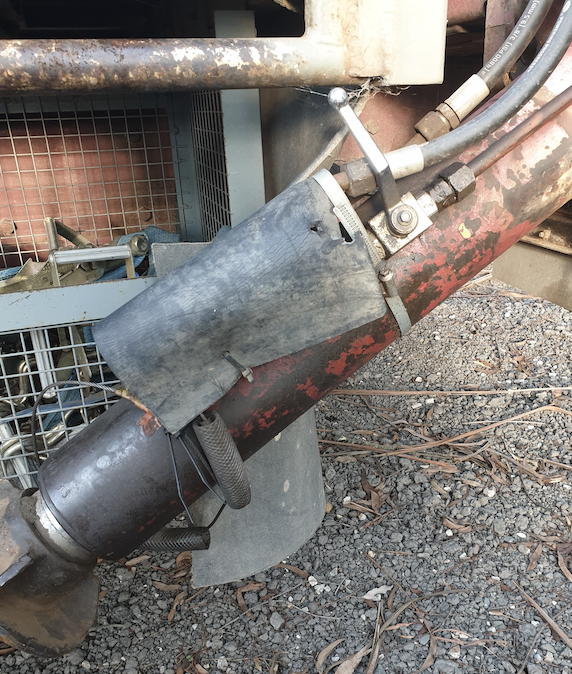
Finned air and oil coolers
Modern trucks have a plethora of finned coolers that hang low and are vulnerable to rock damage. These can be for transmissions, aircon and all sorts of other extras. These fins need their own rubber flaps for protection but be careful not to impede airflow too much or you’ll see overheating. A good solution for these is often to fit a big flap 500mm in front of the fins that will stop the rocks but still allow air to swirl around it when mobile.
Electronic Sensors
Sensor alerts are the bane of late model trucks on outback roads. We’ve been stopped a few times when the transmission sensors on hired trucks get a splatter of mud on a creek crossing that causes the truck to go into limp mode – this can make for a very slow trip. Try and find out where the sensors are and do what you can to protect them from muddy water and if that fails slow right down for creek crossings to avoid water spray getting up over transmissions and gear boxes.
12 Volt power supply in the cab
We often find ourselves in a 24 volt truck so we sometimes need to fit a 12V power supply for a fridge or similar in the cab. We usually run double insulated heavy twin wiring from the battery into the cab (via the cab-tilt hinges) for this purpose. Auto electricians call this double insulated wiring “gas wiring” because it’s the same as what they use for power to gas appliances. Allow a couple of extra hours to fit this or get an auto-electrician to do it.
AdBlue
When hiring a truck make sure to ask if it requires AdBlue. This fuel additive is needed by lots of modern trucks and it can be hard to find in the outback. Phone ahead to ask or if in doubt look into getting your own supply to have on board. Most of these trucks will change to limp mode if you run out of AdBlue and it’s a long way from Windorah to Birdsville at 55km/h.
Truck and cab vibration on corrugated roads
We’ve found that the secret to reducing potentially damaging vibration on badly corrugated roads is to have lower tyre pressures and to experiment with speed to try and find the sweet spot that shakes the least. Really bad vibration can break cab mounts or crack windscreens. It can loosen and damage radiators and anything else bolted to the truck or engine. Trucks will break if shaken badly enough for long enough, treat them kindly. On rare occasions there is no sweet spot on corrugations and the only solution is to drop back to 50km/h and enjoy the scenery. Allow extra time in your schedule for gravel roads.
Driver fatigue management
Our drivers follow strict fatigue management driving and rest breaks in the outback. We always allow extra time in our schedules for flat tyres, minor breakdowns, regular maintenance and air pressure adjustments.
It’s possible to drive from Medlow Bath in the Blue Mountains to Birdsville and meet log-book requirements in just over two days – but we always allow three days for the unexpected and to make sure drivers arrive alert and safe.
Although drivers of smaller trucks and utes don’t need to follow government log book times we get everyone to use the same guidelines anyway – it’s a great way to avoid driver fatigue.
Below is a link to the Queensland professional driver standard hours which are the same for all states. Most infrequent drivers will have more rests and drive fewer hours than this on a given day – but you want to make sure you or your drivers definitely do NOT EXCEED these driving hours.
Roo, emu and cattle collisions
A big enough roo or cow can cause a lot of damage to a truck so we stick to the same rules for all our drivers – get off the road before sunset.
On the rare occasion that a delay requires a bit of night driving we put the truck with the best bullbar and best driving lights at the front of the convoy and we keep good radio communications going to warn of random animals on the side of the road. But even then there’s a high risk of doing very expensive damage. We avoid it where possible.
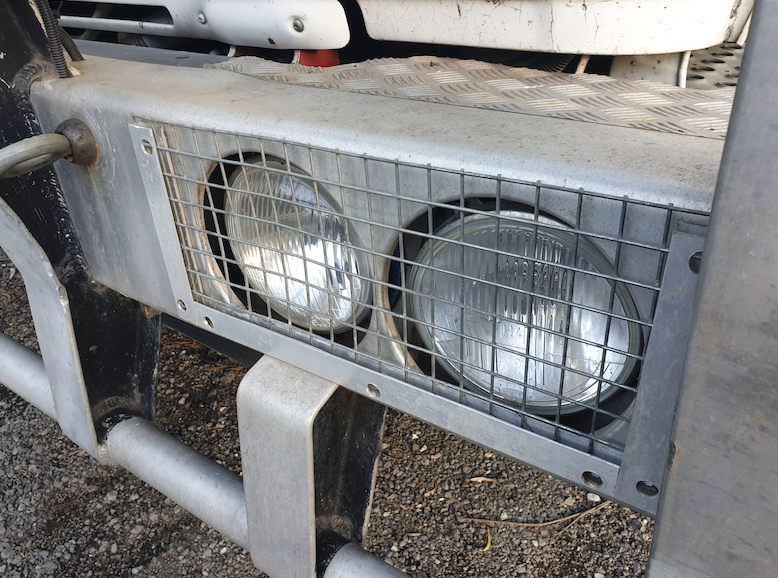
Big trucks on narrow roads
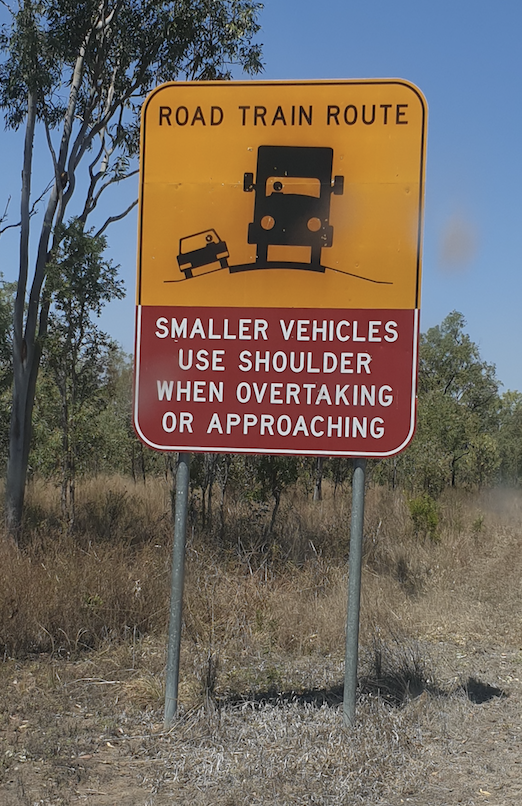
Outback Queensland has long stretches of single-lane bitumen with narrow and rough gravel shoulders.
We advise our truck drivers to stay on the sealed top and let the smaller vehicles pull off. It can be quite risky to take a big truck onto the sloping shoulder and the risk of tipping over is high. But some car drivers and those towing caravans don’t understand and will only get partially off in the expectation that the truck will do the same. The larger truck tends to rule in this situation although trucks drivers should always travel slowly enough to take evasive action if needed (or to give the car drivers more time to realise that it’s better for everyone if they get right off the road and allow the truck to stay on the narrow sealed section).
If another truck comes the other way there’s usually a short discussion over the CB and the smaller truck, or the one with the best shoulder on their side will usually offer to get off the sealed surface.
Wet and slippery roads
Trucks are big and heavy and can be difficult to get out of a bog. Be really wary about where you take them. Send a 4WD or smaller vehicle ahead if in doubt before pulling off to camp if it’s been wet or recently flooded. Know how to use diff and cross-locks if fitted and what their limitations are.
Creek crossings and flooded areas
Trucks with bigger wheels are often the first vehicles allowed to cross deep, flooded crossings once the waters start to recede. Watch what more experienced outback truck drivers do and if in doubt wait and play it safe. Beware of creek crossings where there’s a chance of a washout in the flooded road surface. If in doubt walk it first (still water only).
Enforced stop overs
Sometimes the only option is to camp in a town or beside a flooded crossing and wait for it to go down. If entering areas with a prospect of flooding make sure to carry extra fuel for long detours. And keep extra fuel on hand for generators that provide power for cool rooms or fridge units.
Lucas Trihey 02/03/2020
Since ESS’s first outback trip to Coongie Lakes in 1986 for the Australian Geographic Scientific Expedition our staff have driven most of Australia’s popular 4WD routes and many outback roads. We’ve crossed the Simpson a dozen times and have driven the roads around Birdsville, Innamincka, western Qld and northern SA many times to recce and support desert adventures, commercial treks and when hauling gear and people up and down to the Big Red Run and the awesome Big Red Bash. In the early days it was one LandCruiser, now our fleet includes over a dozen 4WDs and cars, lots of trailers and half a dozen large trucks.
Driving out west is now “business as usual” for our crew and vehicles and over the years we’ve learned what prep we need to do to make sure we get there and back with minimal damage and interruptions.
This post covers what we do to prepare these vehicles. Readers should do your own research and can take from this post what you find useful. We make no recommendations.
What vehicles can get to the Big Red Bash?
With minimal preparation we regularly prepare sponsor vehicles, 2WD and 4WD staff cars and trucks of all sizes. Any car, van, bus or truck can get to the Big Red Bash.
Ruggedising
The loose gravel on most outback roads gets picked up by the front wheels of the vehicle and shoots back to pepper everything behind like a mini sand-blaster. Protecting vulnerable under-body parts is a big part of our vehicle preparation but aside from those measures (described below) most unmodified vehicles can get to Birdsville and the Big Red Bash. We’ve learned that the hand-brake components of the 79 series Cruiser are a bit lightweight and are easily damaged so we’ve fitted extra rubber stone flaps in front of the cable and lever-arms to keep the rocks at bay.
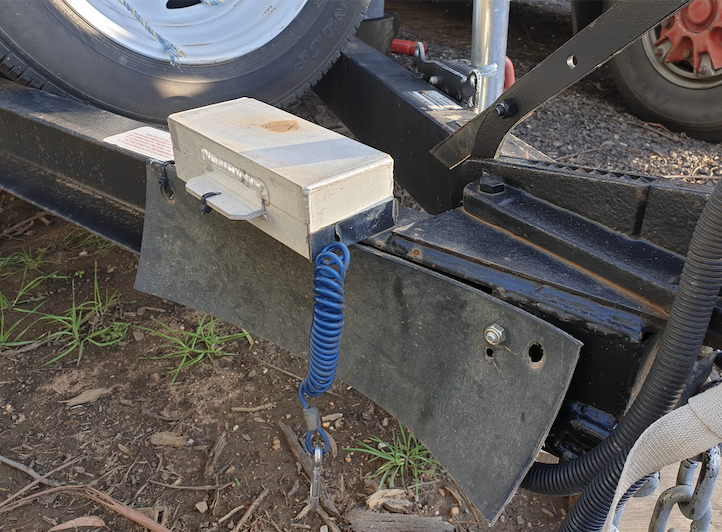
Under-body
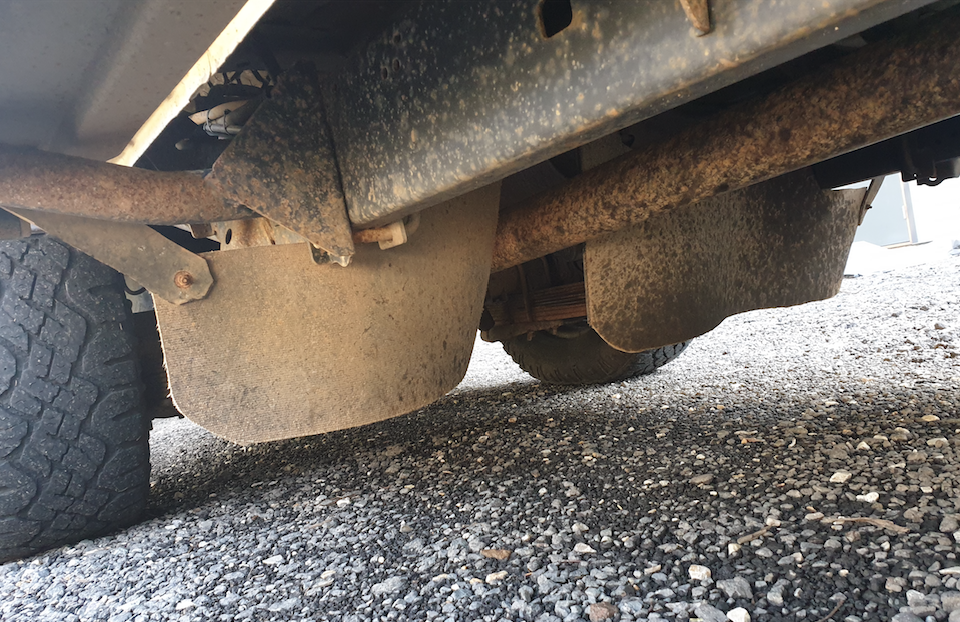
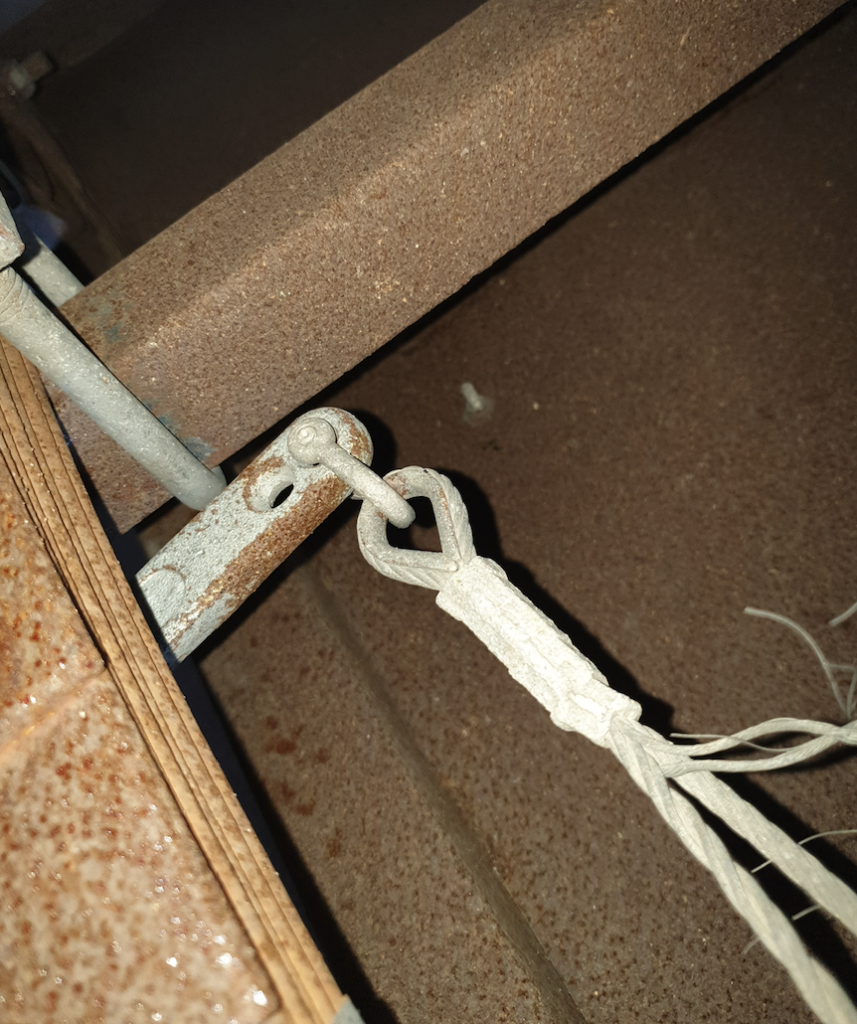
When we get a new crew or sponsor vehicle we lay on the ground and look underneath for exposed wiring or pipes, cooling fins, lightweight brake parts/cables and anything that might get broken by small rocks peppering whatever is exposed down there.
We also look for low hanging major parts like cross-members or transmission parts and consider whether a big rock in the middle of the road might hit this part (more on that topic below under “Clearance”)
Clearance
A very low city car might have transmission components or cross members that hang low. This is fine on a sealed road but isn’t so great on outback roads that sometimes see soft-ball sized rocks in the middle of the road. The main solution for such a vehicle is to drive more slowly so the driver has time to avoid the big rocks. Low profile tyres make low clearance even worse so we consider fitting standard profile tyres for outback trips.
Another clearance issue arises when some years deep wheel ruts get carved out by thousands of 4WDs – this can lead to quite high humps and a low clearance 2WD might scrape on the humps. Slower speeds will allow drivers to avoid the worst of these and our 2WD crew cars usually find a way – but there’s no denying it will make for a slower trip.
Bullbar
Bull bars are useful to minimise the damage from smaller animal strikes but aren’t strong enough to prevent damage from a big roo or cow.
Our golden rule is to get off the road and camp before sunset. This is usually when roos and cattle start appearing (erratically) and/or become harder to spot and avoid. Allow plenty of time in your schedule so you don’t feel that you need to drive in the dark. It’s really easy to hit something and cause $10,000 worth of damage, not to mention needlessly killing an animal.
Roof racks
Fitting a roof rack to a vehicle that doesn’t have strong gutters is always a challenge. Sure there are racks that will screw to the roof of smaller 4WDs and cars but these are generally rated for such small loads that we tend not to bother with them. If it isn’t a large 4WD with decent gutters we don’t fit a rack any more.
Some crew turn up with these small racks and we make sure we keep well under the load rating. Going heavier combined with the vibrations of outback roads is asking for cracked mounts and roof damage. Such racks are fine for a couple of swags or other bulky/light items – but not for anything heavy. Keep the heavy stuff down low and central.
Driving lights
The outback is not the place for night driving so most of our crew vehicles just don’t need big lights. Decent lights are great on the roads closer to the cities but if crew come along with a limited budget we don’t suggest that they fit driving lights. If they’ve already got them – great!
Suspension
Stock suspension is adequate for most of our crew needs.
Our ESS Land Cruiser has the standard Toyota springs in the front and a set of 2” lift King Springs in the back. It’s got heavy duty shocks but nothing fancy, and nothing from a 4WD specialty store. We don’t spend much on brand name 4WD equipment.
The Cruiser regularly tows a 3.5 ton trailer and at Birdsville and on the Bash site it tows every trailer known to man, big and small. It’s also our main recovery vehicle on site at the Bash and regularly gets everything from cars, vans and 4WDs with vans attached out of sand bogs around the site. It even gently snatched a bogged 12 ton prime mover out of a little sand hole in 2019. At the very first Bash in 2013 it pulled a 3 ton trailer with a 110kVA genset up Big Red for the John Williamson show.
Tow hitches
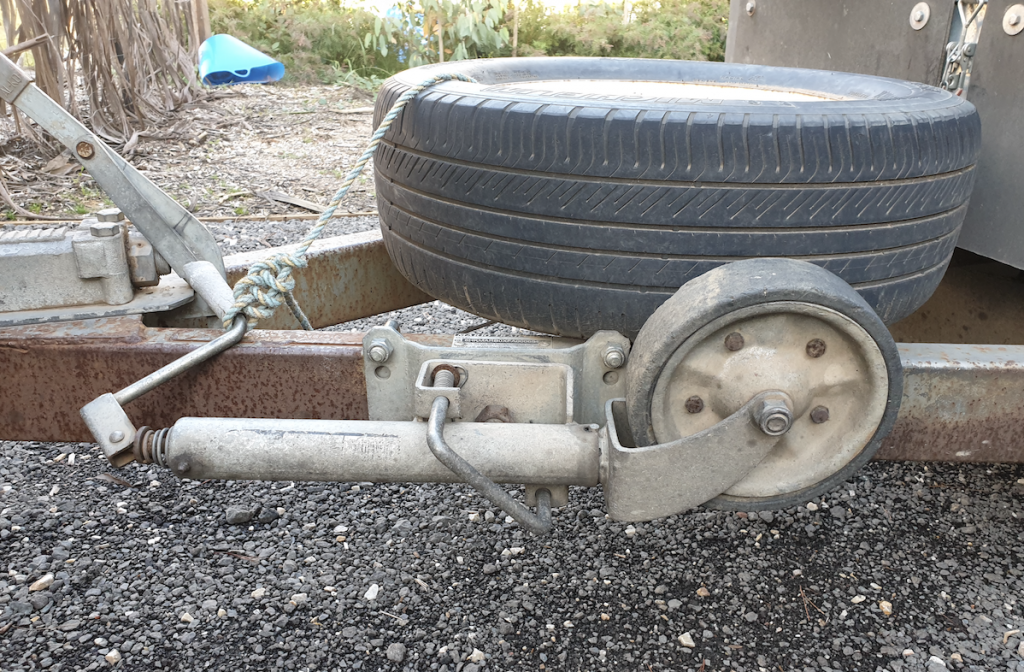
Because we pull so many different trailers we’ve been using an adjustable-height tow hitch and now have these fitted to our Cruiser and Triton 4WD utes.
With a new vehicle in the fleet we check that the tow hitch and mounts are rated for the loads we’ll tow.
Trailer electricals
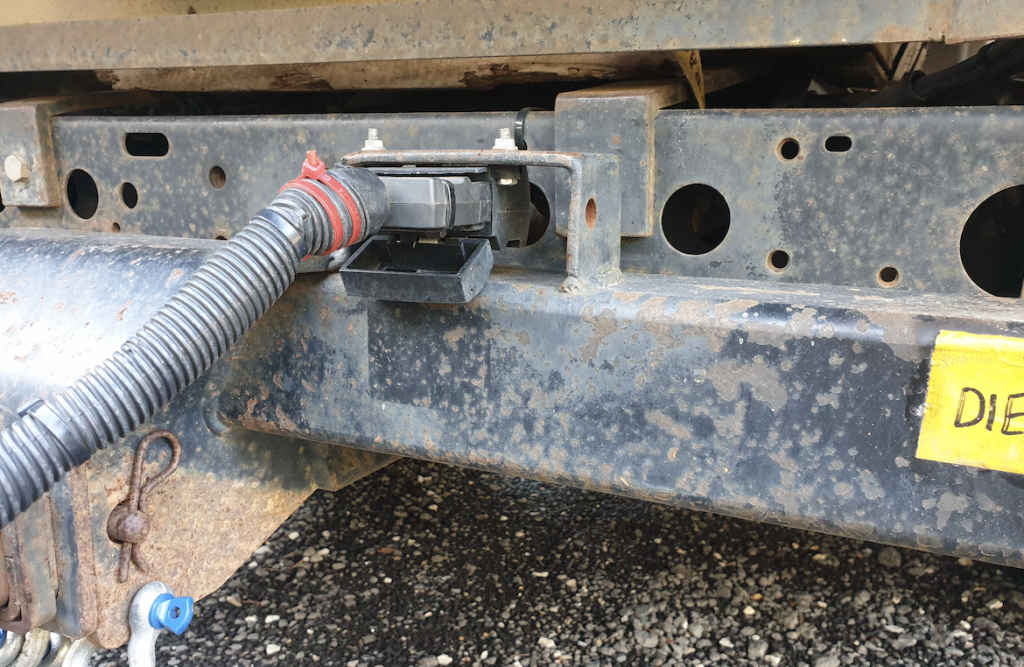
The trailer electrical plug at the rear of the tow vehicle is often fitted to the under-side of the rear tow hitch mounting bar. This hangs too low and will get wrecked after about 40km of the Windorah to Birdsville Road so we move this and mount on top of the bar instead and we also route the wiring safely up high and hidden behind the steel work.
If sponsor vehicles come with the trailer plug socket fitted underneath we remove the bolts and move it up somewhere higher for the loan period and then replace it in the supplied location after the trip.
Auto electric – time for a check up
Faulty or easily damaged auto electrics used to be the most common cause of delays and roadside repairs in our convoys. These days we spend time on every vehicle to check and protect the auto electrics before we leave and we rarely have problems.
We move or protect all exposed wiring underneath, we zip tie all loose wiring so it can’t vibrate or rub through on metal edges. We move vulnerable sockets/plugs and joiners or protect them with rubber mats or a couple of layers of corrugated conduit.
If you don’t feel confident with auto electrics take it to an auto electrician and get them to move or protect anything vulnerable.
We make sure EVERY power supply wire that connects to a battery has a fuse right near the battery to prevent a fire caused by sparking if the insulation wears through.
Battery isolator
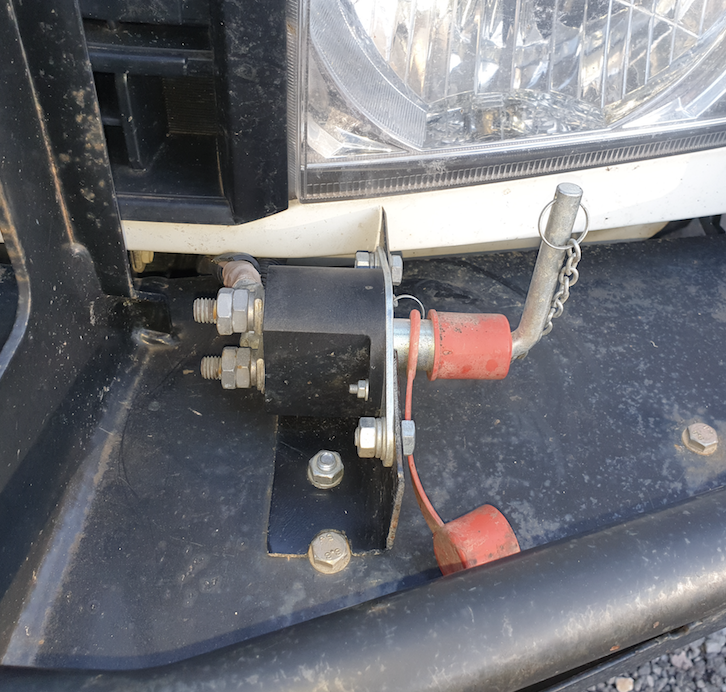
We almost had a vehicle fire one year and since then decided to fit a battery isolator to each battery on every vehicle. There are two reasons we like this set up: (1) if there is a fire (our fire started when a wire wore through yet the fuse didn’t blow) we simply flick the isolator to “OFF” and all electric power is disconnected and (2) If an older vehicle like our heavy rigid crane truck is parked for a long period we use the isolator to avoid any slow trickle loses that can lead to a flat battery. An auto-electrician can fit an isolator.
Windscreen
The best things for your windscreen is to keep your vehicle as far as practicably possible from vehicles going the other way. On single lane outback Queensland roads move off the road so the other vehicle can stay on the sealed top and hence less likely to shower you with rocks. We train all crew in cars to slow down and move off the road. Our trucks tend to stay up on top of the sealed part of the single lane roads for safety and stability.
Tyres
See the recent post about tyres – but briefly – we upgrade to new tyres before a big trip rather than eke out the last few kilometres and have to deal with flats and tyre changes on the trip.
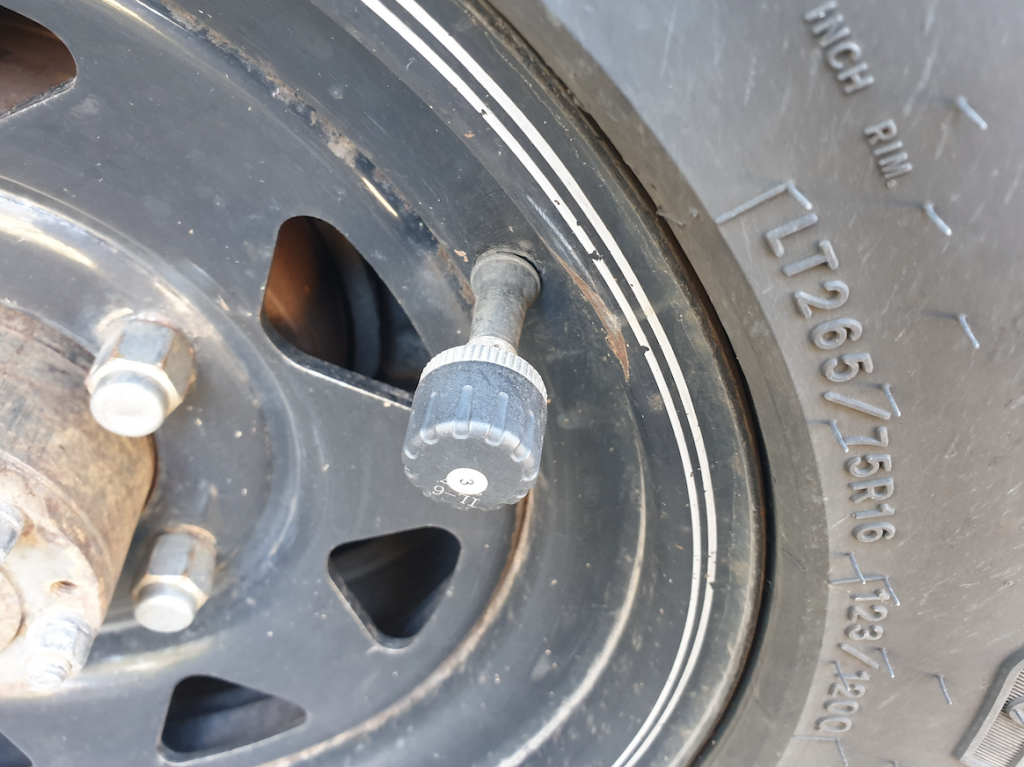
We love our tyre pressure and temp sensors – these save us money every trip by alerting the driver to a slow leak so we can stop and change before it goes flat and gets wrecked.
Choose light truck-rated tyres where possible – they are heavy duty and last longer.
Avoid low profile tyres if possible.
We run lower pressures on all vehicles when on gravel roads and have found this reduces tyre damage and cost. The tyre post has full details.
Lower tyre pressures also help reduce vibration and shocks to sensitive vehicle parts
Once on a trip on the very rough and rarely-graded roads in the APY lands of northern SA I got lazy and didn’t bother lowering my tyre pressures. The horrendous corrugations shook the old Hilux unmercifully and after a couple of hours I developed a leak in the radiator caused by the full-vehicle shuddering and vibration. If the dash and seats are shaking it’s probably due to having the tyres too hard.
The dreaded sensors on flash European vehicles
Low clearance Euro vehicles are designed for sealed roads. They can be used safely on outback roads but we’ve seen some shocking problems and we do a little extra prep work before taking these on outback Qld roads in our crew convoy.
The Euros just love placing sensors, electrical wiring and cooling fins down low under the vehicle. In an already low-clearance van or car this is really asking for trouble from flying rocks. Spend extra time protecting these parts with multiple layers of corrugated conduit, spiral wrap from a hydraulic supplier, rubber matting etc. Be prepared to drive slower on gravel roads so you have time to avoid larger rocks and allow plenty of time so you don’t feel you need to rush.
We had a Euro camper van get mildly bogged in sand at the 2019 Bash. It should have been a pretty easy pull to get it out however something caused the engine to stop and the transmission to lock. It took the owner a couple of phone calls to the dealer to find out a code to get it going again. The “call your nearest dealer” suggestion in the owner’s book wasn’t all that helpful at the Bash.
DIY OR GET PROFESSIONAL HELP?
If you aren’t familiar with what bits do what under your vehicle get a professional involved. We had a memorable moment a few years ago when a junior staff member fitted a protective rubber mat underneath but inadvertently zip-tied it to the tail-shaft. It made a very strange noise and was soon remedied J
WHAT SPARES DO WE TAKE?
Unless we have an older vehicle in the convoy we only carry basic spares. Belts and hoses last okay if checked or replaced before a big trip. We do carry a few auto electric parts as these have proven to be the things that regularly cause issues.
A sheet of windscreen film or temporary windscreen isn’t a bad idea. It isn’t hard to cop a rock through a windscreen.
Tools
If your vehicle isn’t too old and/or hasn’t had a hard life you’ll only need a small tool kit. A trip to Birdsville isn’t overly arduous and is regularly done by standard 2WD Hyundai, Toyota and Nissans. A typical tool kit on a smaller crew vehicle will comprise: a shifting spanner, screw drivers (phillips and flat), pliers, possibly a set of the commonly used combination spanners (ring/open ended) something like 10mm, 13mm, 17mm, 19mm or whatever is common for the vehicle. Duct or gaffer tape, wire, cable ties and Telstra rope.
Weather can happen – allow extra time in your schedule
Western Queensland is a very dry part of Australia, the driest continent on earth. But it occasionally rains and this can affect road conditions. If the weather is looking iffy as the Bash gets close we review our travel plans and departure dates. Some years we’ve sent crew around “the long way” to avoid localised flooding so a few extra days in the schedule can be wise.
The longer, Plan-B routes generally comprise longer sections on sealed roads – it’s usually the more direct gravel or dirt sections that get closed first.
Photo: ESS vehicles towing trailers at Deon’s Lookout, Queensland on the way to set up for the Big Red Bash
ESS and Bash crew have been pulling trailers and vans behind 2WD cars, 4WDs and trucks for years and we’ve learned a few things on this journey.
What follows is our experience and it might help readers and others travelling on outback roads. We make no recommendations other than to say this is what works for us. Take from it what you find helpful.
The following information covers load balance and driving practices with a special focus on avoiding the extremely dangerous “death wobbles” as well as preparing trailers and vans for rough outback roads, tyre selection and more.
HITCH WEIGHT – THE KEY TO AVOIDING THE DEATH WOBBLES
This short video from the Caravan Association of Victoria shows how important weight distribution when loading a van or trailer can be to avoid the death wobbles.
When loading our trailers or vans we aim for roughly 10% of the total trailer weight to be pushing down on the tow hitch at the rear of the tow vehicle. For example if the trailer and load weighs say 2000kg, we’ll aim for between 180kg to 220kg down-force on the tow ball.
Different types of tow vehicles have different specs and requirements so the 10% number is only ever a “guideline”. You should also check your state government and manufacturer specifications.
We never tow trailers outside the manufacturer and govt maximums for total weight and braking requirements.
Our 5.5m tray flat top trailer weighs 1.4T empty and when pulled by our Land Cruiser 79 series the trailer has a gross vehicle mass (GVM) of 3.5T. It has full electric brakes and break away system. We never load it with more than 2.1 tons. We load it so that there is around 250kg on the tow hitch and only our ESS Land Cruiser is big enough and heavy enough (and has the electric brake controller) to tow this trailer.
Our smaller 8X5 box trailers are rated for loads of about 1 ton and have over-ride brakes only on the front wheels. Smaller 4WDs and cars can tow these trailers. We use the 10% guideline for tow hitch weight when loading these trailers. For example we load a trailer with a GVM of 1.8 tons to get 180kg down force on the tow hitch.
We now provide tow vehicles with a set of tow hitch weight scales so drivers can check the tow hitch weight before departure. We use a set of scales like this unit.
Case study 1
As an inexperienced 21 year old in the early 80s I was towing a medium sized, tandem axle , un-braked box trailer on the Melba Highway between Melbourne and Benalla. The trailer was loaded to less than the maximum rated weight with concrete breeze blocks but descending a long gentle hill I got the death wobbles. I knew enough to stay off the car’s brakes and rode the wobble until enough speed washed off and the car and trailer came to a halt in the roadside ditch in a cloud of gravel and dust. Both trailer passenger-side tyres had been torn off their rims, the rear wheel on the car was pushed off the rim and the welds that held the tow hitch to the trailer draw bar were ripped away (the chains held). But miraculously the rest of the trailer and car were okay. This caused me to look into what caused these death wobbles.
I now know that I had loaded the trailer with too much weight to the rear of the balance point. So when the trailer started to wobble it quickly developed a mind of its own and the wobble increased until the rear of the car was being dragged right across the bitumen kicking up gravel on both sides of the two-lane road. I was lucky there was no oncoming traffic.
Case study 2
At the Bash a few years ago we had a covered box trailer that had a few heavy items loaded late and unexpectedly that was loaded right at the rear door. The couple driving it from Sydney to Birdsville had a nightmare trip – every time they went over 85km it’d start to death wobble. They weren’t able to stop and redistribute the load so they had a slow, awful trip.
Since then all loading has been done with more care to load the contents to have enough load over the tow hitch and this never happened again.
PROTECTING THE TOWED TRAILER OR VAN FROM ROCK DAMAGE
Lots of the outback roads we traverse are covered in stones and rocks up to 90mm in diameter. We have generous schedules so our drivers are able to drive slowly enough to be able to spot and avoid the bigger rocks however it’s common that for most of the time on these roads the underside of vehicles and trailers will be peppered by smaller rocks. These rocks can do a lot of damage to exposed materials like plastics, thin cables, pipes and electrical wiring.
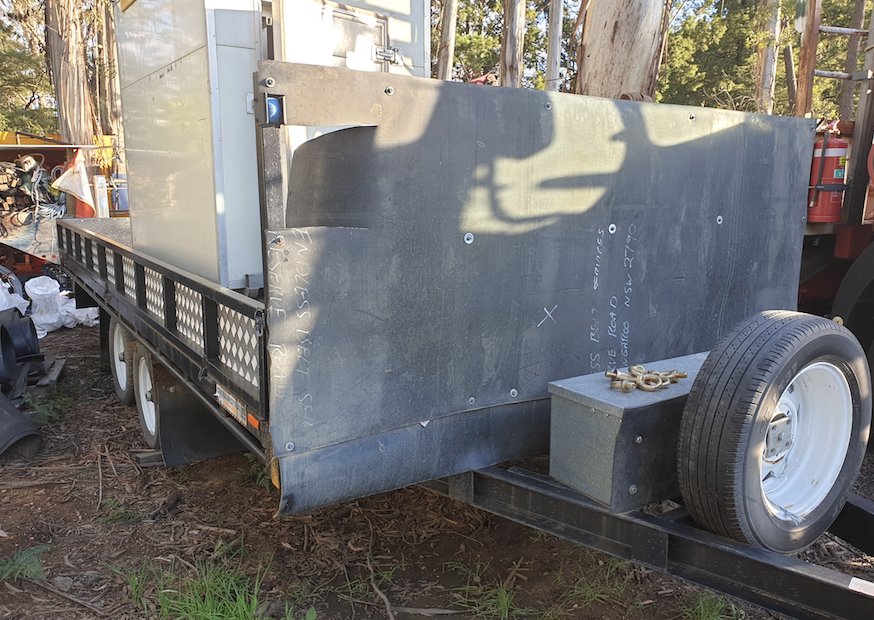
Rubber matting stone guards. We fit full-width rubber stone guards to the fronts of all trailers plus extra stone guards in front of all sensitive components such as brake units, electric wiring and similar. These stone guards are fitted as close to the front of the trailer as we can. Sometimes we weld or bolt a steel angle at the front under the draw bar to attach the rubber. We use old 6mm or 8mm conveyor belt rubber but you can find similar at Clarke Rubber or other suppliers. Look for a rubber with a tough internal fabric weave. The right rubber can be cut with a sharp Stanley knife and bolted to the frame and will survive for a few years of outback stone assaults.
Some crew attach 3mm polyethelene or similar to the front-facing surfaces of their vans with good results and it’s lighter than rubber matting.
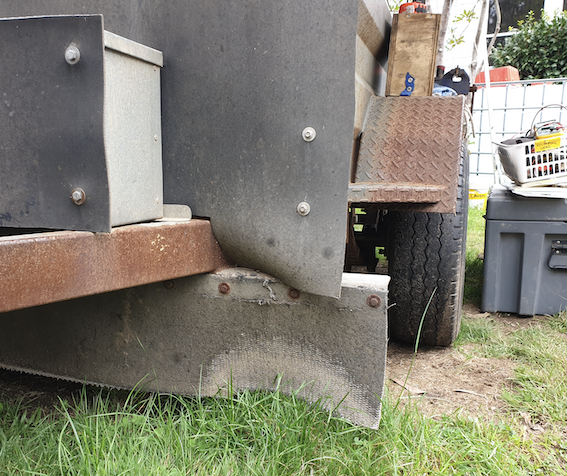
Photo: Rubber conveyor belt matting 6mm used to protect the front of our 8X5, double axle workshop trailer. The lower flap protects the brake cable, drum brakes and u-bolts. The upper matting protects the front of the trailer and reduces rock rebound onto the tow vehicle.
Move or protect the wiring and plumbing. We routinely re-route all exposed electrical wiring or pipes to put them inside the steel or alloy frame or we cover them with steel or a couple of layers of corrugated split conduit or heavy-duty spiral wrap hose protection (available from hydraulic hose suppliers). Pool noodles held in place with cable ties can provide protection for one short trip but will need replacing regularly.
AVOIDING STONE REBOUNDS ONTO TOW VEHICLE REAR WINDOWS
With so many rocks getting airborne behind a tow vehicle it’s quite common for a flying rock to strike the front of a trailer or van and rebound towards the back of the tow vehicle. This has led to many broken rear windows and damage to vulnerable car parts. One year we even had a sponsored Amarok ute with a tub tray lose the cabin rear window to a rebounding rock from a little box trailer it was towing. Those rocks can go a long way.
Our solution is in two parts:
TRAILER MAINTENANCE
Our trailers do many thousands of outback kilometres every year so our maintenance regime includes:
Pre-trip:
During the trip:
TYRES FOR TRAILERS ON OUTBACK ROADS
In an ideal world the trailer tyres will match the tow vehicle – this gives more spare tyres for both vehicles. But with such a variety of trailer and tow vehicle combinations we don’t have that luxury so we simply make sure all tyres are not too old and we have a spare for each. When replacing tyres we usually spend a little extra and get light truck rated tyres for trailers. We rarely carry two spares any more (see the previous post about tyre pressures that explains our reasoning).
Avoid low profile tyres where possible. With less tyre wall in play there simply isn’t as much tyre between the metal rim and the rocky road surface so larger rocks are more likely to hit the rims and do damage or cause pinch-flats.
WHAT ABOUT SWAY BARS AND WEIGHT DISTRIBUTION HITCHES?
We have little experience with sway bars on trailers or vans so can’t add much helpful comment.
We haven’t installed sway bars on any ESS vehicles and none of our other crew trailers have them. Some of our crew tow vans with sway bars or weight distribution hitches and like them.
Our thinking at ESS is that if trailers are loaded with the correct amount of downward pressure on the tow hitch sway bars are not needed. So far this has proved to be adequate for our operations although I’d happily consider sway bars if someone proves a benefit. We tend to be very pragmatic with our fleet dollars and unless there’s an obvious, proven benefit we’ll stick to the most basic set up that gets the job done safely.
VENTS
We see people taping over vents on vans to reduce dust entry. Just remember that these vents must be uncovered and functional when using gas appliances inside the van for your safety.
Lucas Trihey 26/01/2020
With thanks to our machinery operator and Bash regular Don Coleman for contributing.
Photo: Whether 4WD or trucks all ESS vehicles run on lowered tyre pressures on rough outback roads. Pictured here are the ESS LandCruiser and Mercedes 22 ton truck with 14 ton tri-axle trailer at the Big Red Bash in 2019.
Lucas Trihey explains what his crew does with their tyres for outback work
Lucas has been driving 4WDs, cars and trucks on gravel and sandy outback roads since the 80s. He has worked on everything from the first Australian Geographic expedition to the remote Coongie Lakes in 1986, to supporting desert trekkers across the Simpson to leading the team that over seven years has set up the legendary Big Red Bash musical concert 35km west of Birdsville.
In my early outback driving I was lucky enough to meet Adam Plate from the Pink Roadhouse at Oodnadatta. Adam had witnessed and repaired thousands and thousands of punctured and damaged tyres from the rough South Australian outback roads. From Adam I learned that the best preventative against tyre damage is to run pressures significantly lower that highway pressures.
Adam told me that a softer tyre will ride over a sharp rock rather than battering into it at high pressure with more chance of damaging the tyre structure via repeated small cuts and tears that will eventually lead to a failure.
What we look for when deflating is an obvious bulge to the tyre that shows us that the tyre will be a little more spongy to absorb the shocks of a rough road surface and the occasional sharp-edge rocks laying on the surface.
On our event 4WDs and smaller cars we usually decrease pressure to about 75% or 80% of highway pressures. On our trucks we deflate to about 55% of highway pressures.
The tyres on a lightly laden vehicle will need a little more deflation to achieve the desired bulge compared to a heavily laden vehicle.
4WDs AND CARS
Typically we’ll deflate my event LandCruiser (a dual cab 70-series with a couple of passengers and about 500 kilograms in the back) to 25F and 30R to get the bulge we want It’s currently on Goodyear Wranglers – a medium to heavily structured tyre. Our single cab Triton Ute will be deflated to 18F and 25R if not heavily laden. We have a Nissan X-Trail (with highway tyres) in the crew convoy and it’s usually at about 18F and 20R for the desired bulge.
TRUCKS
We’ve always run our event trucks at far lower than highway pressures and a few years ago met a double road train driver at the end of the sealed road (110km west of Windorah). He’d just delivered 45 tons of fencing materials to a station further west and he told me his company’s guideline is “50% pressures on the gravel mate”.
Our trucks often carry loads onto on soft, sandy surfaces including the lake bed for the Big Red Bash and the sand dunes of the Uluru and Burke and Wills treks.
We run a few large and medium trucks from NSW to the Bash and these tend to run at 50% to 60% of highway pressures to get the desired bulge. My Mercedes Heavy Rigid truck is a bogie drive, 6.5m tray, rigid truck with a rear loading crane that weighs 12T empty and is typically around 20T when loaded for the Bash. It pulls a 6m tri-axle trailer with super-single tyres. It runs 55psi all around once on the gravel roads (recommended highway pressures are about 110psi).
We run our semi trailers at about 60% all round (prime mover and trailer). Our medium rigid single-axle-drive pantechs tend to run at 60% of highway pressures all around on the gravel.
On the return trips we happily leave the pressures low as we poke back along a sealed road to the next servo where we re-inflate. But for the now mostly-empty trucks we’ve often run them back to the Blue Mountains at 55% and the tyres are standing up tall again and we’ve seen no obvious signs of unusual wear or seen any issue with handling or heat.
TYRE MONITORS
Since the 2018 Bash we’ve run tyre monitors on our 4WDs and the HR Mercedes truck so we can monitor pressures and temperatures from the driver’s seat. These have validated our pressure decisions – and we’ve seen that running lower pressures on the gravel hasn’t led to over-heating.
Monitors also alert you to a rapid deflation so you can stop before the now-flat tyre is destroyed. One destroyed 4WD tyre is roughly the cost of a set of tyre monitors. We use SAFETY DAVE external units but there are many brands.
LOW PRESSURES AND SPEED
What we’ve seen via our tyre monitors is that lower pressures on 4WDs and trucks seem to be fine for the maximum speeds we feel safe at on gravel roads. Once back on the bitumen we usually inflate back to the manufacturer’s recommended pressures. However we often run our own 4WDs and trucks on lower pressures on sealed roads to get back to a nice fast compressor at slightly lower than normal speeds without ill effects. Tyre monitors are really good in these situations because the driver can watch the temps and make sure nothing too silly is happening.
OUR RECORD WITH TYRE DAMAGE
Since adopting low tyre pressures on our crew vehicles we’ve seen a sharp decline in blow outs and punctures. In my early outback driving days it wasn’t unusual to have multiple punctures and more than one blowout on some of the rougher SA outback roads.
These days we still get an occasional flat tyre but nearly always these are caused from picking up a screw or sharp piece of wire at the town tip or council yard rather than from a high-speed blow out.
At the 2018 Bash with four crew or event trucks and a dozen 4WDs/SUVs we got two slow leaks on the trucks and one slow leak on a SUV. None of the 4WDs had tyre damage. At the 2019 Bash with four event/crew trucks and a dozen 4WDs/SUVs we had one tyre failure on a sponsored Amarok (a direct hit on a very large, sharp rock near Innamincka). There was no tyre damage on the trucks or other vehicles.
HOW MANY SPARES DO WE CARRY?
A search of the online 4WD and outback forums will see lots of recommendations that you need “two spares” for outback driving. Taking two spares isn’t a bad idea but remember that a spare wheel is a very heavy item. For my own and our convoy vehicles we only ever carry one spare now – simply because we hardly ever get tyre damage. If I had a vehicle with tyres down to the last 15% of tread I’d think about taking two spares but for a good tyre, not too old, we only bother with one for most trips.
TIME TO REPLACE OLD TYRES?
We usually replace older tyres BEFORE a big trip. We believe it’s a false economy to try and eke out every last kilometre from an old tyre on an outback trip. Have good tyres at the start and you’ll be less likely to be forced to get a non-matching or inferior tyre from a remote outback roadhouse. You’ll also be less likely to get flats from dropped nails or screws.
LOW PROFILE TYRES ARE A BIT SPECIAL
Low profile tyres are a bit challenging on rough roads. It isn’t possible to run them at the low pressures we usually like because there simply isn’t the same amount of buffer between the outer tyre surface and the rim. If we hit a medium sized rock with low pressures on a low profile tyre it can do rim damage and possibly result in a pinch flat. If we have to take a low profile tyre on these roads we don’t run at our normal low pressures and we accept that we’ll probably see more damage to such tyres than we are happy with. We also drive more slowly and try our hardest to avoid rocks. We generally upgrade low profile tyres to bigger more conventional profiles as soon as we can. We currently have a 5.5m flat top car trailer that came with low profile tyres that we took to the 2019 Bash and we’ll be upgrading as soon as we can.
SUMMARY OF TYRE CARE FOR ROUGH GRAVEL ROADS
WHAT SHOULD YOU DO?
We’ve explained what we do with our crew vehicles but we because everyone’s needs and situation is different we make no hard recommendations – do your research and make your own decisions.
Veteran of a lots of semi-planned nights out in the mountains and safety consultant to hundreds of expeditions and trail runs, Lucas Trihey explains what event crew can do to prepare.
Event crew, whether paid or volunteers are the backbone of Australian trail running. Crew often end up miles from backup and might need to depend on their own resources if stuff happens.
SKILLS AND PREPARATION
GEAR – PACK A GRAB BAG OF ESSENTIALS
Have a grab bag packed and with you in case you need to go bush to help at a remote marshal position or to stay and help an injured runner. This is the deluxe list with everything you could conceivably need – use it as a checklist for small or big events:
BE PREPARED FOR THINGS TO GO WRONG
Most of the time we are a lucky species, however stuff DOES happen and proper preparation can be life-saving.
Develop a pessimistic streak – ask the ”what ifs”:
What if the runners don’t finish by dark as planned?
What if an Aid Station runs out of water or food?
What if a bunch of runners get lost?
Will a mechanical break down mean a crew vehicle can’t get much needed water and supplies to an Aid Station in time?
Will exhausted runners survive a deterioration of weather in Alpine areas?
GET SCEPTICAL
Get used to the idea that tired runners are no longer normal people. “Runner’s brain” can lead them to make bad decisions, miss turns, forget to navigate. They don’t put on warm gear until too cold, they forget to eat enough, they push on when exhausted and then collapse in places where it’s hard to get them.
Do organisers have reserves of resources? Surge capacity can be very useful when a few things go wrong at once (spare crew, vehicles, equipment etc).
Learn about the compounding and cascading effects of small mistakes and omissions in a complex organisation. Sometime an otherwise inconsequential error can be the straw that breaks the camel’s back.
How good is the Risk Management Plan? Does it look objectively at what might go wrong or does it gloss over the true risks?
Are there crew in the team who can navigate to an injured, ill or lost runner in the rain and dark?
ESS has the gear and expertise to do on-site blood analysis for a range of useful tests. We can do tests that help our doctors, nurses and first aiders with medical conditions related to electrolyte imbalance, cardiac issues, kidney ailments and lots more. This gear has proven helpful in diagnosing an illness, ruling out a potential illness and has definitely improved the care we can offer a patient. Our blood testing equipment goes to all the big and/or remote events.
Photo: On the North Ridge of Mt Cook Aoraki, NZ, 1994. Photo Lucas Trihey
ESS staff have a background in the outdoors. Many are qualified guides, climbers, mountaineers, white-water paddlers and trail runners. We have doctors who’ve won the toughest Sky Runs (hello Jacinta!) and who hold BASE Jump and Windsuit records (gidday Glenn!).
Our regular staff have climbed Mt Cook in NZ, are expeditioners with experience in Antarctica, the Australia high country, the dark forests and alpine areas of Tassie and in the mountain areas in the Karakoram of northern Pakistan and western China. We’ve guided on the snow-capped mountains of Africa and have trekked in the Kimberley of WA.
What do our staff experts wear in the bush?
Well… what they DON”T wear is cotton.
In the world of bush search and rescue, canyon guiding, climbing mountains and inhospitable cold and wet environments cotton is known as “The Fatal Fabric”.
Cotton is hydro-phyllic – it loves water – so it makes a great towel. In fact it’s been reported as being able to absorb up to 27 times its own weight in water. If you wear cotton in a cold and wet place you’ll end up with a damp, clammy garment against your skin. It can get this water from rain or from your sweat. The fabric saps the heat out of your body, makes the battle against hypothermia impossible to win and it takes ages to dry.
So when it’s cold and wet you’ll only see ESS staff wearing synthetics or a good quality merino garment.
There’s more info in this article: https://www.gizmodo.com.au/2015/02/why-cotton-kills-a-technical-explanation/
Lucas Trihey is an expeditioner, outdoor education lecturer, safety director for trail events and ESS principal. He’s trained for Swift Water Rescue and here explains the guidelines for when deep or fast-flowing water gets too dangerous. He also outlines what, if anything, event organisers can do and when it’s simply time to cancel.
Photo: the author high and dry in big water on the north side of the Karakoram in Xinjiang, China on an expedition to 7400m Mt Chongtar in the 90s. Photo: Colin Monteath
Experienced trail runners know that “runner’s brain” can lead them to make mistakes and bad decisions when fatigued. Tired runners place their trust in organisers to make high-level decisions about matters like water levels, lightning or wind storms and bushfires. When organisers fail in this role people get hurt.
A good rule of thumb for Australian conditions is that organisers will need to implement extra safety measures to keep runners safe if:
The water is above knee deep, even if slow-flowing.
OR
The water is flowing faster than walking pace (5km/hour) even if shallow.
WHILE EVERY SITUATION IS DIFFERENT, SAFETY MEASURES CAN INCLUDE:
WHAT NOT TO DO IN DEEP OR FAST WATER